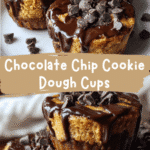
Irresistible Chocolate Chip Cookie Dough Cups You Have to Try
There’s a special kind of magic in those simple moments when you bite into something that feels like a little hug from your childhood. For me, Chocolate Chip Cookie Dough Cups bring that magic to life. Growing up in a white farmhouse nestled in the Blue Ridge Mountains, food was more than sustenance—it was a language of love, stitched together by my grandmother, Mama Lu. She never measured ingredients the way most recipes ask you to; instead, she gave you a pinch of this and a dash of that, all seasoned with stories and soul. These cookie dough cups remind me of those days spent with flour-dusted hands and laughter on the porch, turning humble ingredients into something unforgettable. Today, I want to share that same warmth with you in a recipe that’s as comforting as a Sunday pot roast but with a playful, sweet twist.
Table of Contents
Why You’ll Love This Chocolate Chip Cookie Dough Cups
Chocolate Chip Cookie Dough Cups are one of those treats that capture the best of both worlds—the nostalgic comfort of homemade cookie dough and the delight of a perfectly portioned dessert. You get the creamy, buttery dough with generous pockets of melty chocolate, all nestled in a cup that’s easy to grab and enjoy without the mess. It’s a bit like the skillet cornbread Mama Lu used to pull from the oven—simple, satisfying, and made for sharing.
What makes these cups truly special isn’t just the flavor but the way they bring people together. I remember those long afternoons shelling peas with Mama Lu, stories swirling around us like the sweet mountain air. These cookie dough cups have that same spirit—perfect for gathering around the table, passing plates, and making memories.
Plus, if you’ve ever wished for cookie dough you could eat safely by the spoonful without worry, these cups are your answer. They’re made without eggs and with heat-treated flour, so you can enjoy every bite straight from the cup or warmed up slightly for a melty, gooey experience. Whether you’re serving them at a family gathering or sneaking a treat on a quiet evening, they hit the spot every time.
Ingredients You’ll Need for This Chocolate Chip Cookie Dough Cups

- 1 cup all-purpose flour (heat-treated for safety; see tips below)
- 1/2 cup unsalted butter, softened
- 1/3 cup packed light brown sugar
- 1/4 cup granulated sugar
- 1 teaspoon vanilla extract
- 2 tablespoons milk (whole or 2% works best)
- 1/4 teaspoon salt
- 1/2 cup mini semi-sweet chocolate chips
- Optional: 1/4 cup chopped toasted pecans or walnuts for a little crunch
If you’re looking to make these a bit lighter, swapping out half of the butter for coconut oil can add a subtle tropical note and reduce saturated fat. For dairy-free versions, use your favorite plant-based butter and almond or oat milk instead of regular milk. The key here is keeping the dough soft and scoopable, so slight substitutions are welcome.
Nutrition Facts
- Calories: Approximately 220 per cup (serving size about 1/4 cup dough)
- Protein: 2 grams
- Fat: 12 grams (mostly from butter)
- Carbohydrates: 26 grams
- Fiber: 1 gram
- Sugar: 15 grams
- Sodium: 90 milligrams
Remember, these numbers can shift a bit depending on ingredient brands and substitutions, but they give you a good ballpark. Like all treats, these are best enjoyed in moderation, especially since they’re rich with butter and sugar—the kind of indulgence that’s worth every bite when shared with people you love. Learn more: Discover the Irresistible Delight of Better Than Anything Bars
PrintIrresistible Chocolate Chip Cookie Dough Cups You Have to Try

Learn how to make delicious Chocolate Chip Cookie Dough Cups. Easy recipe with step-by-step instructions.
- Prep Time: 15 minutes
- Cook Time: 30 minutes
- Total Time: 45 minutes
- Yield: 4 servings 1x
- Category: Main Dish
- Method: Cooking
- Cuisine: International
Ingredients
- 1 cup all-purpose flour (heat-treated for safety; see tips below)
- 1/2 cup unsalted butter, softened
- 1/3 cup packed light brown sugar
- 1/4 cup granulated sugar
- 1 teaspoon vanilla extract
- 2 tablespoons milk (whole or 2% works best)
- 1/4 teaspoon salt
- 1/2 cup mini semi-sweet chocolate chips
- Optional: 1/4 cup chopped toasted pecans or walnuts for a little crunch
If you’re looking to make these a bit lighter, swapping out half of the butter for coconut oil can add a subtle tropical note and reduce saturated fat. For dairy-free versions, use your favorite plant-based butter and almond or oat milk instead of regular milk. The key here is keeping the dough soft and scoopable, so slight substitutions are welcome.
Instructions
- Start by heat-treating your flour to keep things safe for eating raw. Spread the flour evenly on a baking sheet and bake at 350°F for 5 minutes. Let it cool completely before using. This is a step Mama Lu never needed to explain, but in the city kitchens of Portland, it’s a must.
- In a large bowl, cream together the softened butter, brown sugar, and granulated sugar until the mixture is light and fluffy. This usually takes about 3-4 minutes with a hand mixer or a sturdy wooden spoon.
- Mix in the vanilla extract and milk until everything is combined and smooth. The dough should be soft but hold its shape when scooped.
- Gradually add in the cooled, heat-treated flour and salt. Stir gently until just combined—overmixing can make the dough tough, and we want it tender like Mama Lu’s biscuits.
- Fold in the mini chocolate chips and, if using, the chopped nuts. This is where the magic happens—melty chocolate melting into buttery dough, with a little crunch for texture.
- Scoop the dough into silicone muffin cups or a lined mini muffin tin, filling each about three-quarters full. This recipe makes roughly 12 small cups.
- Chill the cups in the refrigerator for at least 30 minutes to firm up. If you’re impatient like me, a quick 15-minute stint in the freezer works too.
- Enjoy straight from the fridge for a cool, creamy bite or warm them for 10 seconds in the microwave for that fresh-from-the-oven feel.
When I first tried this, I was reminded of those porch swings in the Blue Ridge, the slow afternoons where food wasn’t rushed but savored. These steps honor that tradition, letting the dough rest and the flavors meld, just like Mama Lu’s slow-cooked pot roasts.
Steps to Create Your Chocolate Chip Cookie Dough Cups
- Start by heat-treating your flour to keep things safe for eating raw. Spread the flour evenly on a baking sheet and bake at 350°F for 5 minutes. Let it cool completely before using. This is a step Mama Lu never needed to explain, but in the city kitchens of Portland, it’s a must.
- In a large bowl, cream together the softened butter, brown sugar, and granulated sugar until the mixture is light and fluffy. This usually takes about 3-4 minutes with a hand mixer or a sturdy wooden spoon.
- Mix in the vanilla extract and milk until everything is combined and smooth. The dough should be soft but hold its shape when scooped.
- Gradually add in the cooled, heat-treated flour and salt. Stir gently until just combined—overmixing can make the dough tough, and we want it tender like Mama Lu’s biscuits.
- Fold in the mini chocolate chips and, if using, the chopped nuts. This is where the magic happens—melty chocolate melting into buttery dough, with a little crunch for texture.
- Scoop the dough into silicone muffin cups or a lined mini muffin tin, filling each about three-quarters full. This recipe makes roughly 12 small cups.
- Chill the cups in the refrigerator for at least 30 minutes to firm up. If you’re impatient like me, a quick 15-minute stint in the freezer works too.
- Enjoy straight from the fridge for a cool, creamy bite or warm them for 10 seconds in the microwave for that fresh-from-the-oven feel.
When I first tried this, I was reminded of those porch swings in the Blue Ridge, the slow afternoons where food wasn’t rushed but savored. These steps honor that tradition, letting the dough rest and the flavors meld, just like Mama Lu’s slow-cooked pot roasts.
Tips for Making the Best Chocolate Chip Cookie Dough Cups
- Softened butter is key: Butter straight from the fridge won’t cream properly. Let it sit at room temperature until it’s soft but not melted.
- Heat-treat your flour: This step is non-negotiable for safe raw dough. I always do this even if it adds a few extra minutes—it’s worth it for peace of mind.
- Use mini chocolate chips: They distribute more evenly, making every bite a little surprise. Larger chips can overpower the delicate dough texture.
- Don’t overmix: Stir just until ingredients come together to keep the dough tender and soft.
- Chill before serving: Refrigeration helps the flavors develop and makes the cups easier to handle.
- Customize your add-ins: Feel free to toss in dried cherries, toffee bits, or even a sprinkle of sea salt on top to elevate the flavor.
- Use silicone cups for easy removal: Nothing’s more frustrating than sticky dough clinging to metal tins. Mama Lu’s lessons about “working smart, not hard” always ring true here.
Serving Suggestions and Pairings

These Chocolate Chip Cookie Dough Cups shine on their own, but if you want to turn them into a full dessert experience, here are some ways I like to serve them:
- With a scoop of vanilla bean ice cream and a drizzle of warm caramel sauce for a decadent treat.
- Alongside a cup of freshly brewed coffee or a rich hot chocolate—the perfect pairing for an afternoon pick-me-up.
- Sprinkled with flaky sea salt and a side of fresh berries for a balance of sweet and tart.
- As part of a dessert platter with other nostalgic treats like Mama Lu’s skillet cornbread and blackberry jam, to bring a bit of the mountains to your table.
One of my fondest memories is sitting on the porch at dusk, sharing simple sweets like these with family and friends while the cicadas hummed in the background. These cups bring that feeling to your kitchen no matter where you are.
Storage and Reheating Tips
Chocolate Chip Cookie Dough Cups are best enjoyed fresh, but they also store nicely if you want to make a batch ahead of time.
- Keep them covered in an airtight container in the refrigerator for up to 5 days.
- For longer storage, freeze the cups in a single layer on a baking sheet, then transfer to a freezer-safe bag or container. They’ll keep well for up to 3 months.
- To thaw, leave them in the fridge overnight or at room temperature for about 30 minutes.
- Warm gently in the microwave for 10-15 seconds before serving to recapture that fresh-baked feel.
When I bring these out during a visit home or share them with friends in Portland, the way they hold their shape and flavor over time always surprises people. It’s like a little pocket of the Blue Ridge carried in every bite.
Frequently Asked Questions
What are the main ingredients for Chocolate Chip Cookie Dough Cups?
The main ingredients for Chocolate Chip Cookie Dough Cups include the items listed in our ingredients section above. Each ingredient plays a crucial role in achieving the perfect flavor and texture.
How long does it take to make Chocolate Chip Cookie Dough Cups?
The total time to make Chocolate Chip Cookie Dough Cups includes both preparation and cooking time. Check the recipe card above for exact timing details.
Can I make Chocolate Chip Cookie Dough Cups ahead of time?
Yes, Chocolate Chip Cookie Dough Cups can often be prepared in advance. Store it properly in an airtight container in the refrigerator and consume within the recommended timeframe.
What can I serve with Chocolate Chip Cookie Dough Cups?
Chocolate Chip Cookie Dough Cups pairs well with various sides and accompaniments. Consider the serving suggestions mentioned in the recipe for the best dining experience.
Is Chocolate Chip Cookie Dough Cups suitable for special diets?
Depending on the ingredients used, Chocolate Chip Cookie Dough Cups may be adapted for various dietary needs. Check the ingredients list and consider substitutions as needed for your dietary requirements.
Final Thoughts
Making Chocolate Chip Cookie Dough Cups reminds me that sometimes, the simplest recipes are the ones that connect us most deeply to our roots. Growing up in that farmhouse, Mama Lu taught me that cooking isn’t just about following steps—it’s about honoring tradition, sharing love, and creating moments that linger long after the last crumb is gone. These cookie dough cups carry that spirit forward: they’re easy enough for a weeknight treat but special enough to serve when you want to wrap someone in a warm, sweet embrace.
I hope you find as much comfort and joy in these cups as I do. Whether you’re sharing them with family, friends, or savoring a quiet moment on your own porch swing, they’re a little taste of home, no matter where you are.