Irresistible Pumpkin Snickerdoodle Bars You Need to Try
There’s something about the smell of cinnamon and pumpkin mingling in the kitchen that takes me right back to Mama Lu’s farmhouse, where the warmth of the oven was as comforting as the stories she’d tell while stirring a pot. Pumpkin Snickerdoodle Bars capture that same spirit — they’re not just a treat, but a little slice of home, wrapped in cozy spices and tender crumb. Whenever I make these bars, I’m reminded of those slow afternoons on the porch swing, where food was a language spoken with love and a pinch of soul.
Table of Contents
Why You’ll Love This Pumpkin Snickerdoodle Bars
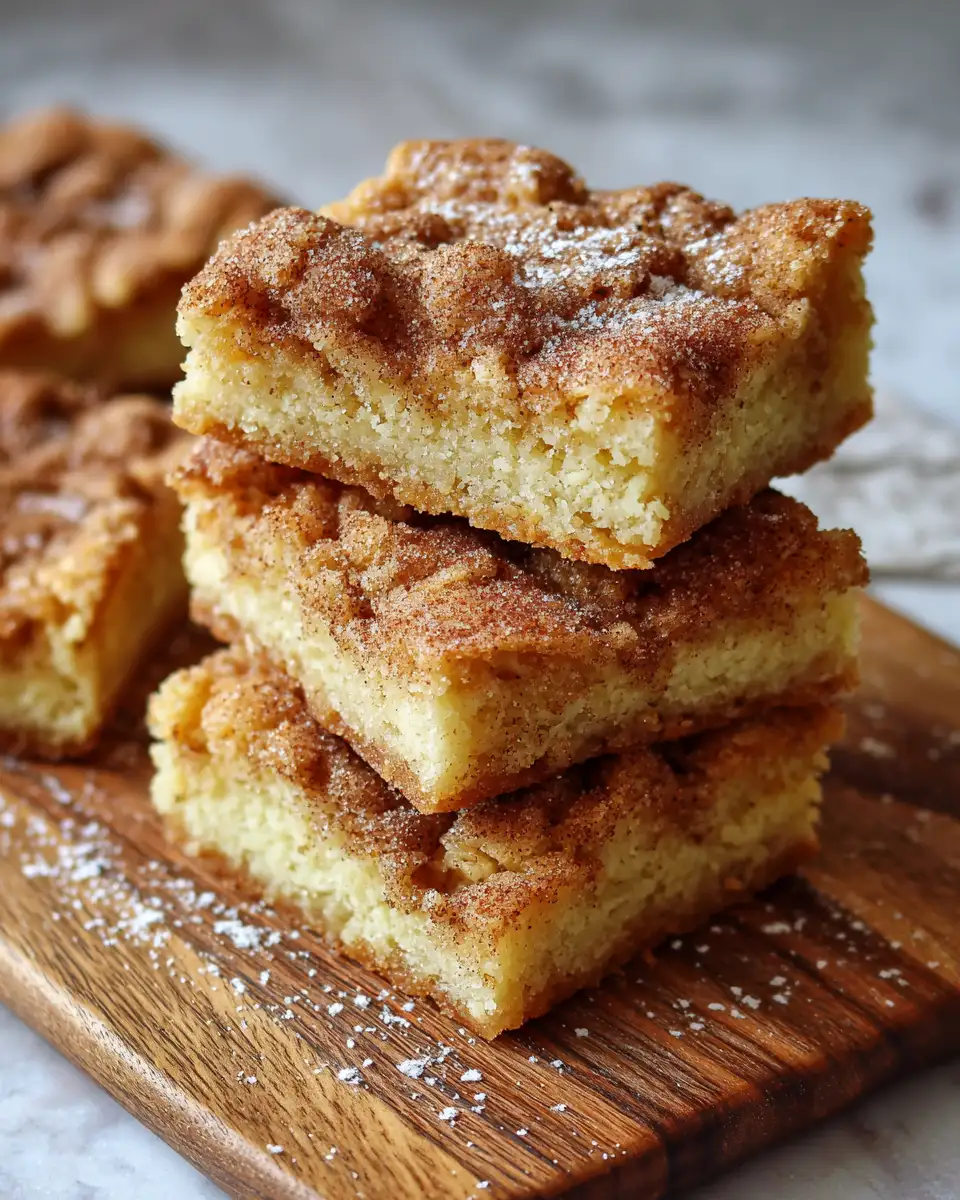
When I first set out to create a pumpkin snickerdoodle, I wanted something that felt like a hug in dessert form, something that didn’t need fancy ingredients or complicated steps — just honest flavors that bring people closer. These bars are that and more. They boast the soft, chewy texture of a classic snickerdoodle cookie, but with a lush pumpkin twist that adds moisture and depth. The cinnamon-sugar topping crisps up just enough to give a little crunch without losing that tender bite inside.
Coming from the Blue Ridge Mountains, I learned early that desserts like these were less about perfection and more about connection. You don’t need to measure every sprinkle or second on the clock — you just have to feel it out, taste as you go, and share the results with those you love. These bars are perfect for those moments when you want a simple, homey dessert that feels like it’s been passed down through generations, even if you’re just discovering it now.
Ingredients You’ll Need for This Pumpkin Snickerdoodle Bars

- 1 ¾ cups all-purpose flour (or whole wheat pastry flour for a nuttier flavor)
- 1 teaspoon baking powder
- ½ teaspoon baking soda
- 1 ½ teaspoons ground cinnamon
- ½ teaspoon ground nutmeg
- ¼ teaspoon ground cloves
- ¼ teaspoon salt
- ½ cup unsalted butter, softened (or coconut oil for a dairy-free option)
- 1 cup granulated sugar
- 1 large egg
- 1 teaspoon vanilla extract
- ½ cup pumpkin puree (homemade or canned, but pure pumpkin, not pumpkin pie filling)
- 2 tablespoons sugar (for topping)
- 1 teaspoon ground cinnamon (for topping)
When I first started making these bars, I didn’t fuss too much with substitutions — Mama Lu always said, “Work with what you got, and make it yours.” But I’ve found that swapping out the butter for coconut oil gives these bars a lovely subtle richness that pairs beautifully with the pumpkin. If you prefer a little less sugar, you can cut back to ¾ cup and still have plenty of sweetness, especially with that cinnamon-sugar topping.
Nutrition Facts
- Calories: Approximately 280 per serving (based on 12 bars)
- Protein: 3 grams
- Fat: 10 grams
- Carbohydrates: 42 grams
- Fiber: 2 grams
- Sugar: 25 grams
- Sodium: 150 milligrams
These are rough estimates, of course, but they give you a sense of how these bars balance indulgence with wholesome ingredients like pumpkin and warm spices. Growing up, Mama Lu never worried about counting calories — it was more about feeding the soul and filling bellies with care. So while these bars are a sweet treat, they also bring in a bit of nutrition from the pumpkin and whole spices.
PrintIrresistible Pumpkin Snickerdoodle Bars You Need to Try
Learn how to make delicious Pumpkin Snickerdoodle Bars. Easy recipe with step-by-step instructions.
- Prep Time: 15 minutes
- Cook Time: 30 minutes
- Total Time: 45 minutes
- Yield: 4 servings 1x
- Category: Main Dish
- Method: Cooking
- Cuisine: International
Ingredients
- 1 ¾ cups all-purpose flour (or whole wheat pastry flour for a nuttier flavor)
- 1 teaspoon baking powder
- ½ teaspoon baking soda
- 1 ½ teaspoons ground cinnamon
- ½ teaspoon ground nutmeg
- ¼ teaspoon ground cloves
- ¼ teaspoon salt
- ½ cup unsalted butter, softened (or coconut oil for a dairy-free option)
- 1 cup granulated sugar
- 1 large egg
- 1 teaspoon vanilla extract
- ½ cup pumpkin puree (homemade or canned, but pure pumpkin, not pumpkin pie filling)
- 2 tablespoons sugar (for topping)
- 1 teaspoon ground cinnamon (for topping)
When I first started making these bars, I didn’t fuss too much with substitutions — Mama Lu always said, “Work with what you got, and make it yours.” But I’ve found that swapping out the butter for coconut oil gives these bars a lovely subtle richness that pairs beautifully with the pumpkin. If you prefer a little less sugar, you can cut back to ¾ cup and still have plenty of sweetness, especially with that cinnamon-sugar topping.
Instructions
- Preheat your oven to 350°F and line an 8×8-inch baking pan with parchment paper, leaving some overhang to lift the bars out easily.
- In a medium bowl, whisk together the flour, baking powder, baking soda, cinnamon, nutmeg, cloves, and salt. This blend of spices is where the magic begins — I like to close my eyes and imagine Mama Lu’s kitchen, where these scents were always in the air.
- In a large bowl, using a hand mixer or stand mixer, cream the softened butter and granulated sugar together until light and fluffy, about 3-4 minutes. This step is like setting the foundation — you want that fluffy texture to carry your bars.
- Add the egg, vanilla extract, and pumpkin puree to the butter mixture. Beat until fully combined and smooth. The pumpkin adds moisture and that signature fall flavor, much like the blackberry jam Mama Lu would spread thick on fresh cornbread.
- Gradually add the dry ingredients to the wet ingredients, mixing just until combined. Resist the urge to overmix here — the bars will be tender and soft when you stop as soon as the flour disappears.
- Spread the batter evenly into your prepared baking pan. Smooth the top gently with a spatula or the back of a spoon, just like I remember Mama Lu smoothing batter into her cast iron skillet.
- In a small bowl, mix together the topping sugar and cinnamon. Sprinkle this evenly over the top of the batter. This step is where the snickerdoodle’s signature cinnamon-sugar crust begins to form — I always imagine that little sprinkle as a kiss from home.
- Bake for 30-35 minutes, or until a toothpick inserted into the center comes out with just a few moist crumbs. The edges should be lightly golden and the top slightly crackled.
- Allow the bars to cool completely in the pan before lifting out with the parchment paper. Cooling lets the flavors settle and the texture become just right — soft but sturdy enough to cut.
- Cut into 12 squares and serve. I often find these bars taste even better the next day, once the flavors have fully melded — a little patience goes a long way, just like waiting for Mama Lu’s Sunday pot roast.
Steps to Create Your Pumpkin Snickerdoodle Bars
- Preheat your oven to 350°F and line an 8×8-inch baking pan with parchment paper, leaving some overhang to lift the bars out easily.
- In a medium bowl, whisk together the flour, baking powder, baking soda, cinnamon, nutmeg, cloves, and salt. This blend of spices is where the magic begins — I like to close my eyes and imagine Mama Lu’s kitchen, where these scents were always in the air.
- In a large bowl, using a hand mixer or stand mixer, cream the softened butter and granulated sugar together until light and fluffy, about 3-4 minutes. This step is like setting the foundation — you want that fluffy texture to carry your bars.
- Add the egg, vanilla extract, and pumpkin puree to the butter mixture. Beat until fully combined and smooth. The pumpkin adds moisture and that signature fall flavor, much like the blackberry jam Mama Lu would spread thick on fresh cornbread.
- Gradually add the dry ingredients to the wet ingredients, mixing just until combined. Resist the urge to overmix here — the bars will be tender and soft when you stop as soon as the flour disappears.
- Spread the batter evenly into your prepared baking pan. Smooth the top gently with a spatula or the back of a spoon, just like I remember Mama Lu smoothing batter into her cast iron skillet.
- In a small bowl, mix together the topping sugar and cinnamon. Sprinkle this evenly over the top of the batter. This step is where the snickerdoodle’s signature cinnamon-sugar crust begins to form — I always imagine that little sprinkle as a kiss from home.
- Bake for 30-35 minutes, or until a toothpick inserted into the center comes out with just a few moist crumbs. The edges should be lightly golden and the top slightly crackled.
- Allow the bars to cool completely in the pan before lifting out with the parchment paper. Cooling lets the flavors settle and the texture become just right — soft but sturdy enough to cut.
- Cut into 12 squares and serve. I often find these bars taste even better the next day, once the flavors have fully melded — a little patience goes a long way, just like waiting for Mama Lu’s Sunday pot roast.
Tips for Making the Best Pumpkin Snickerdoodle Bars
Here’s where I channel those flour-dusted afternoons with Mama Lu and the lessons learned from a kitchen where heart mattered more than precision: Learn more: Irresistible Pumpkin Swirl Cheesecake Bars You Have to Try
- Don’t skip the spices: The blend of cinnamon, nutmeg, and cloves is what gives these bars their warm, nostalgic flavor. If you have fresh nutmeg, grate a little in — it makes a world of difference.
- Use real pumpkin puree: I’ve seen folks try to shortcut with pumpkin pie filling, but that’s a no-go in my book. Pure pumpkin keeps the flavor clean and lets you control the sweetness.
- Softened, not melted butter: The texture of your bars depends heavily on the butter’s state. Remember, you want it soft enough to cream, but not so melted that the batter gets greasy.
- Keep an eye on the baking time: Ovens vary, especially in old farmhouses or rustic kitchens. Start checking at 30 minutes to avoid overbaking — these bars should be soft and tender.
- Let them cool completely: This is one of those moments Mama Lu would say, “Patience, child.” Cooling lets the bars set properly and makes cutting easier.
Serving Suggestions and Pairings
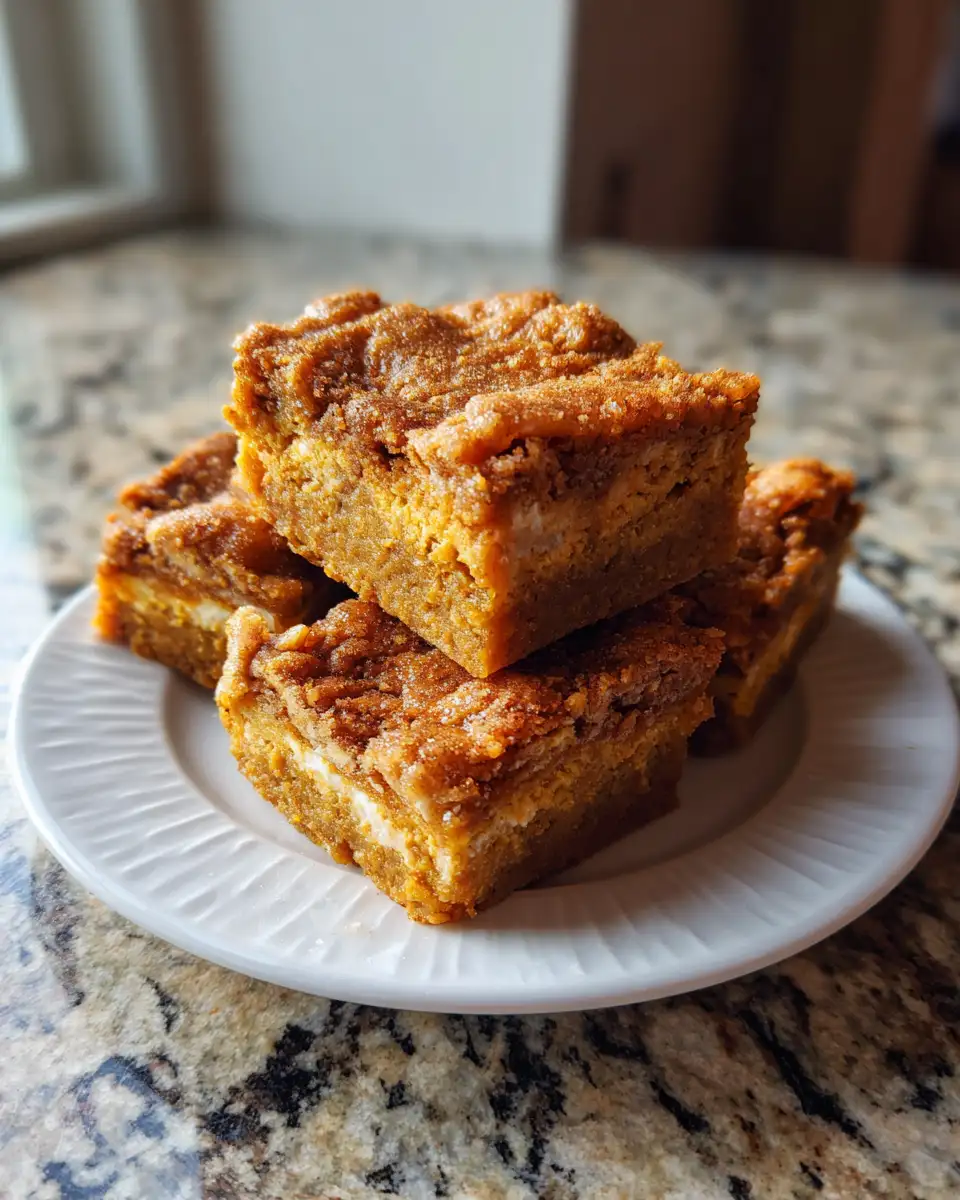
Back in the mountains, we never ate desserts alone — they were part of a gathering, a reason to linger around the table a little longer. These bars are perfect companions for:
- A hot cup of black coffee or a creamy chai latte — the spices in the bars dance beautifully with warm, spiced drinks.
- A dollop of whipped cream sweetened lightly with maple syrup for an extra touch of indulgence.
- A scoop of vanilla bean ice cream, especially on a chilly afternoon when you want a little contrast between warm and cold.
- Fresh fruit like sliced apples or pears, which add a crisp, refreshing balance to the richness of the bars.
I remember one autumn afternoon when I brought a batch of these bars to a potluck in Portland. They vanished quickly, with folks asking if the recipe was a family secret. I smiled, knowing that every bite carried a bit of the Blue Ridge Mountains with it.
Storage and Reheating Tips
Like any good home recipe, these bars do well kept close — they’re best enjoyed fresh but hold up nicely for a few days if stored properly.
- Storage: Keep the bars in an airtight container at room temperature for up to 3 days. If your kitchen is warm, refrigerate to prevent spoilage.
- Freezing: For longer storage, wrap individual bars tightly in plastic wrap and place in a freezer-safe bag. They’ll keep well for up to 2 months.
- Reheating: Warm bars in a low oven (about 300°F) for 5-7 minutes or microwave for 15-20 seconds. This brings back that fresh-baked softness and warms the spices.
Whenever I reheat a bar, I think of Mama Lu’s kitchen — the way she’d warm leftovers with care, making even simple food feel like a feast.
Frequently Asked Questions
What are the main ingredients for Pumpkin Snickerdoodle Bars?
The main ingredients for Pumpkin Snickerdoodle Bars include the items listed in our ingredients section above. Each ingredient plays a crucial role in achieving the perfect flavor and texture.
How long does it take to make Pumpkin Snickerdoodle Bars?
The total time to make Pumpkin Snickerdoodle Bars includes both preparation and cooking time. Check the recipe card above for exact timing details.
Can I make Pumpkin Snickerdoodle Bars ahead of time?
Yes, Pumpkin Snickerdoodle Bars can often be prepared in advance. Store it properly in an airtight container in the refrigerator and consume within the recommended timeframe.
What can I serve with Pumpkin Snickerdoodle Bars?
Pumpkin Snickerdoodle Bars pairs well with various sides and accompaniments. Consider the serving suggestions mentioned in the recipe for the best dining experience.
Is Pumpkin Snickerdoodle Bars suitable for special diets?
Depending on the ingredients used, Pumpkin Snickerdoodle Bars may be adapted for various dietary needs. Check the ingredients list and consider substitutions as needed for your dietary requirements.
Final Thoughts
Pumpkin Snickerdoodle Bars are more than just a recipe — they’re a bridge to a place where food was a language of love, where measuring was done by feel and flavor, and where every bite told a story. Whether you’re nestled in a city apartment or a farmhouse in the mountains, these bars invite you to slow down, savor the moment, and share something sweet with the people you care about.
I hope these bars bring a little bit of my childhood kitchen to yours, wrapped up in cinnamon, pumpkin, and a sprinkle of soul. Remember, cooking isn’t about perfection — it’s about connection. So gather your ingredients, stir with your heart, and enjoy every bite.

