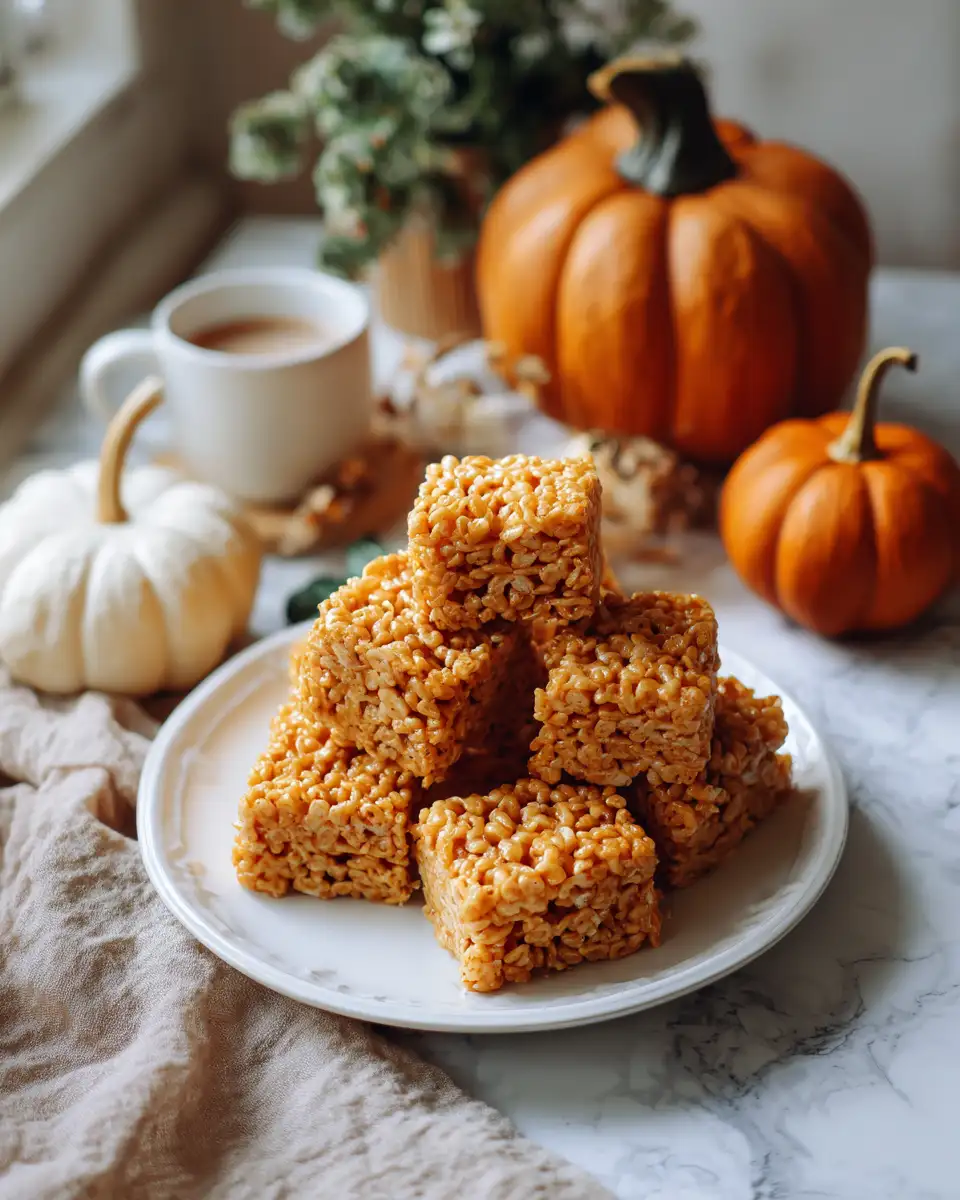
Irresistible Pumpkin Rice Krispie Treats Perfect for Fall Snacking
There’s a certain magic that happens when the crisp fall air meets the warm, cozy scents of pumpkin and vanilla melting together in the kitchen. Pumpkin Rice Krispie Treats are one of those little miracles that remind me of childhood afternoons spent on Mama Lu’s porch, where the air was thick with the smell of wood smoke and fresh-baked cornbread. These treats take the simple joy of classic Rice Krispies and give them a gentle twist, folding in the earthiness of pumpkin and just a hint of spice. It’s a recipe that speaks to the heart — simple, comforting, and utterly irresistible.
Table of Contents
Why You’ll Love This Pumpkin Rice Krispie Treats
Growing up in the Blue Ridge Mountains, food was never just about eating; it was about gathering, storytelling, and passing down love through generations. Pumpkin Rice Krispie Treats capture that spirit perfectly. They’re quick to make, which means you have more time to sit back on the porch swing, just like Mama Lu and I did, sharing stories while the treats set. Plus, the pumpkin adds a moistness and flavor depth that elevates these beyond the usual marshmallow-and-crisp-rice combo.
This recipe also bridges the gap between seasons — a little nod to autumn without the heaviness of a full pumpkin pie. The subtle spices remind me of those Sunday dinners where the whole family would linger long after the plates were cleared, savoring every last bite and every last word. Whether you’re looking for a festive snack or a nostalgic treat, these Pumpkin Rice Krispie Treats are a little slice of home.
Ingredients You’ll Need for This Pumpkin Rice Krispie Treats
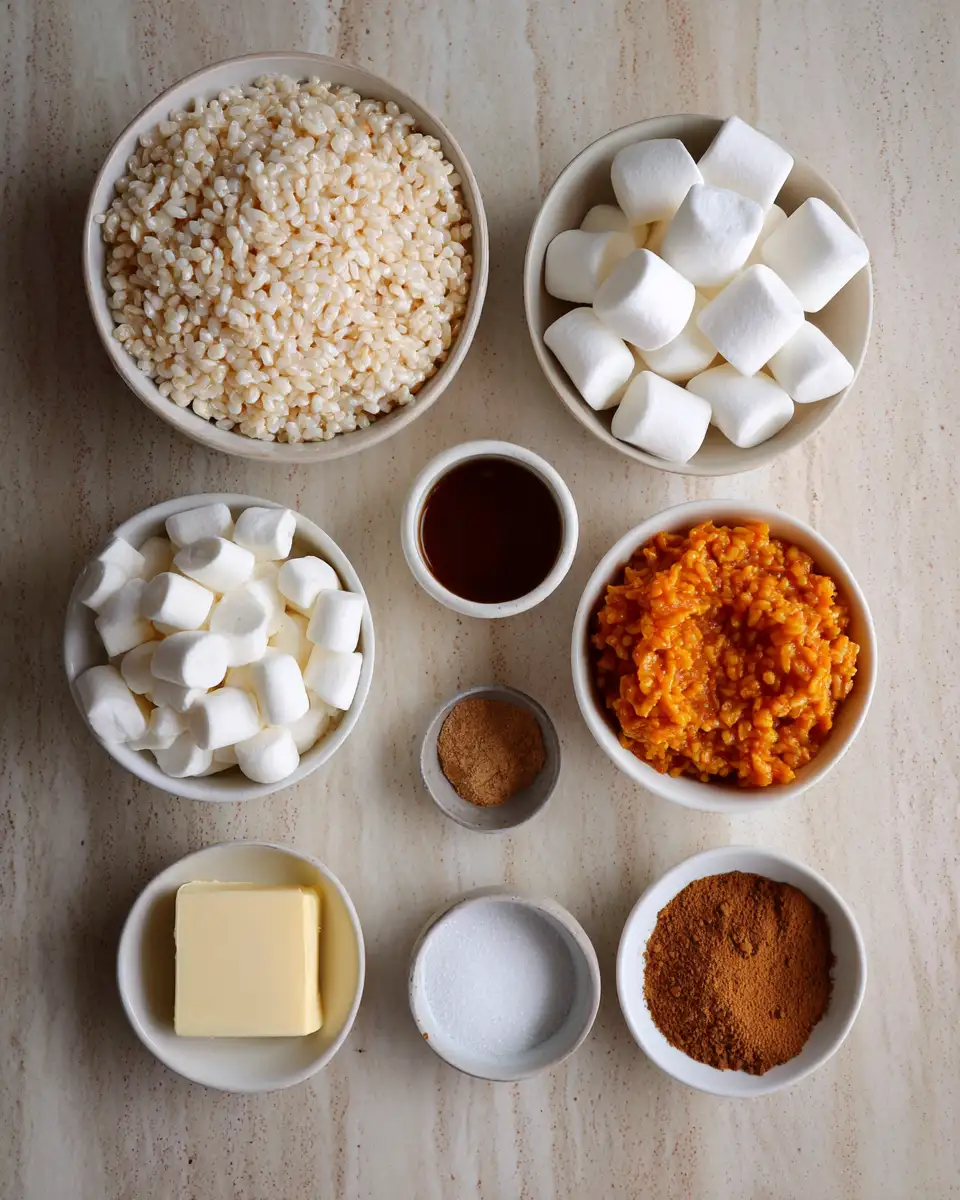
- 6 cups Rice Krispies cereal
- 3 tablespoons unsalted butter
- 1 (10-ounce) package marshmallows (or 4 cups homemade marshmallow fluff)
- 1/2 cup pumpkin puree (fresh or canned, but not pumpkin pie filling)
- 1 teaspoon vanilla extract
- 1 teaspoon ground cinnamon
- 1/2 teaspoon ground nutmeg
- 1/4 teaspoon ground ginger
- 1/4 teaspoon salt
If you’re looking to substitute, feel free to swap the butter for coconut oil for a dairy-free option. For a little extra crunch, you can stir in a handful of chopped pecans or walnuts, a nod to the nut trees Mama Lu always had growing out back. And if you want to add a touch of sweetness, a tablespoon of maple syrup stirred into the melted marshmallow mixture works wonders.
Nutrition Facts
- Calories: Approximately 180 per serving (based on 12 servings)
- Protein: 2 grams
- Fat: 5 grams
- Carbohydrates: 33 grams
- Fiber: 1 gram
- Sugar: 20 grams
- Sodium: 120 milligrams
These treats are certainly a sweet indulgence, but with the addition of pumpkin, they bring a bit of nutritional goodness to the table — a little boost of fiber and vitamin A that you won’t find in your average Rice Krispie treat. It’s the kind of balance Mama Lu would have appreciated: a treat that feels like a splurge but carries a whisper of wholesome goodness.
PrintIrresistible Pumpkin Rice Krispie Treats Perfect for Fall Snacking
Learn how to make delicious Pumpkin Rice Krispie Treats. Easy recipe with step-by-step instructions.
- Prep Time: 15 minutes
- Cook Time: 30 minutes
- Total Time: 45 minutes
- Yield: 4 servings 1x
- Category: Main Dish
- Method: Cooking
- Cuisine: International
Ingredients
- 6 cups Rice Krispies cereal
- 3 tablespoons unsalted butter
- 1 (10-ounce) package marshmallows (or 4 cups homemade marshmallow fluff)
- 1/2 cup pumpkin puree (fresh or canned, but not pumpkin pie filling)
- 1 teaspoon vanilla extract
- 1 teaspoon ground cinnamon
- 1/2 teaspoon ground nutmeg
- 1/4 teaspoon ground ginger
- 1/4 teaspoon salt
If you’re looking to substitute, feel free to swap the butter for coconut oil for a dairy-free option. For a little extra crunch, you can stir in a handful of chopped pecans or walnuts, a nod to the nut trees Mama Lu always had growing out back. And if you want to add a touch of sweetness, a tablespoon of maple syrup stirred into the melted marshmallow mixture works wonders.
Instructions
- Grease a 9×13-inch baking dish with butter or line it with parchment paper for easy removal.
- In a large pot over low heat, melt the butter gently, stirring often to prevent browning.
- Once melted, add the marshmallows and stir continuously until fully melted and smooth. This usually takes about 5 minutes.
- Lower the heat and stir in the pumpkin puree, vanilla extract, cinnamon, nutmeg, ginger, and salt. Mix until everything is well combined and the spices are fragrant — you’ll know it’s ready when the mixture smells like a cozy autumn afternoon.
- Remove the pot from heat and immediately fold in the Rice Krispies cereal, stirring gently but thoroughly to coat every crisp.
- Pour the mixture into your prepared pan and use a buttered spatula or your hands (lightly buttered, of course) to press it down evenly and firmly. Don’t press too hard, or your treats will turn out dense instead of light and chewy.
- Let the treats cool at room temperature for at least 2 hours to set. If you’re in a hurry, pop them in the refrigerator for about 30 minutes.
- Once set, cut into squares or bars and serve. I like to cut mine into rustic, uneven pieces — it reminds me of how Mama Lu would simply slice and serve whatever was fresh out of the skillet, no fuss needed.
One of my favorite memories is standing by Mama Lu’s stove, waiting for the marshmallows to melt, the house filling with that sweet, spicy aroma. She’d always tell me to “watch and listen,” because food, like stories, reveals itself in the little moments — the way marshmallows bubble and stretch, the way spices bloom in the heat.
Steps to Create Your Pumpkin Rice Krispie Treats
- Grease a 9×13-inch baking dish with butter or line it with parchment paper for easy removal.
- In a large pot over low heat, melt the butter gently, stirring often to prevent browning.
- Once melted, add the marshmallows and stir continuously until fully melted and smooth. This usually takes about 5 minutes.
- Lower the heat and stir in the pumpkin puree, vanilla extract, cinnamon, nutmeg, ginger, and salt. Mix until everything is well combined and the spices are fragrant — you’ll know it’s ready when the mixture smells like a cozy autumn afternoon.
- Remove the pot from heat and immediately fold in the Rice Krispies cereal, stirring gently but thoroughly to coat every crisp.
- Pour the mixture into your prepared pan and use a buttered spatula or your hands (lightly buttered, of course) to press it down evenly and firmly. Don’t press too hard, or your treats will turn out dense instead of light and chewy.
- Let the treats cool at room temperature for at least 2 hours to set. If you’re in a hurry, pop them in the refrigerator for about 30 minutes.
- Once set, cut into squares or bars and serve. I like to cut mine into rustic, uneven pieces — it reminds me of how Mama Lu would simply slice and serve whatever was fresh out of the skillet, no fuss needed.
One of my favorite memories is standing by Mama Lu’s stove, waiting for the marshmallows to melt, the house filling with that sweet, spicy aroma. She’d always tell me to “watch and listen,” because food, like stories, reveals itself in the little moments — the way marshmallows bubble and stretch, the way spices bloom in the heat. Learn more: Easy Ground Beef Nachos Recipe for a Crowd-Pleasing Snack
Tips for Making the Best Pumpkin Rice Krispie Treats
Over the years, I’ve learned that the secret to perfect Pumpkin Rice Krispie Treats is all in the timing and the care you put into mixing. Here are a few tips from my kitchen to yours:
- Don’t rush melting the marshmallows. Keep the heat low and stir often to avoid burning. Mama Lu always said, “Slow and steady keeps the flavor ready.”
- Use fresh pumpkin puree. If you can, roast your own pumpkin and puree it. It adds an earthier flavor that canned just can’t match.
- Measure your spices carefully. A little nutmeg goes a long way, so start small and adjust to your taste.
- Press gently. Pressing too hard can make the treats tough. Aim for a light, even layer.
- Cool completely before slicing. This helps the treats hold their shape and makes cutting easier.
- Store in an airtight container. These treats can dry out quickly if left exposed, so keep them sealed to maintain their chewy texture.
I remember one crisp October when I brought a batch of these treats to a potluck in Portland. They disappeared so fast that I had to jot down the recipe on the spot — a reminder that good food, like good stories, is meant to be shared and savored.
Serving Suggestions and Pairings
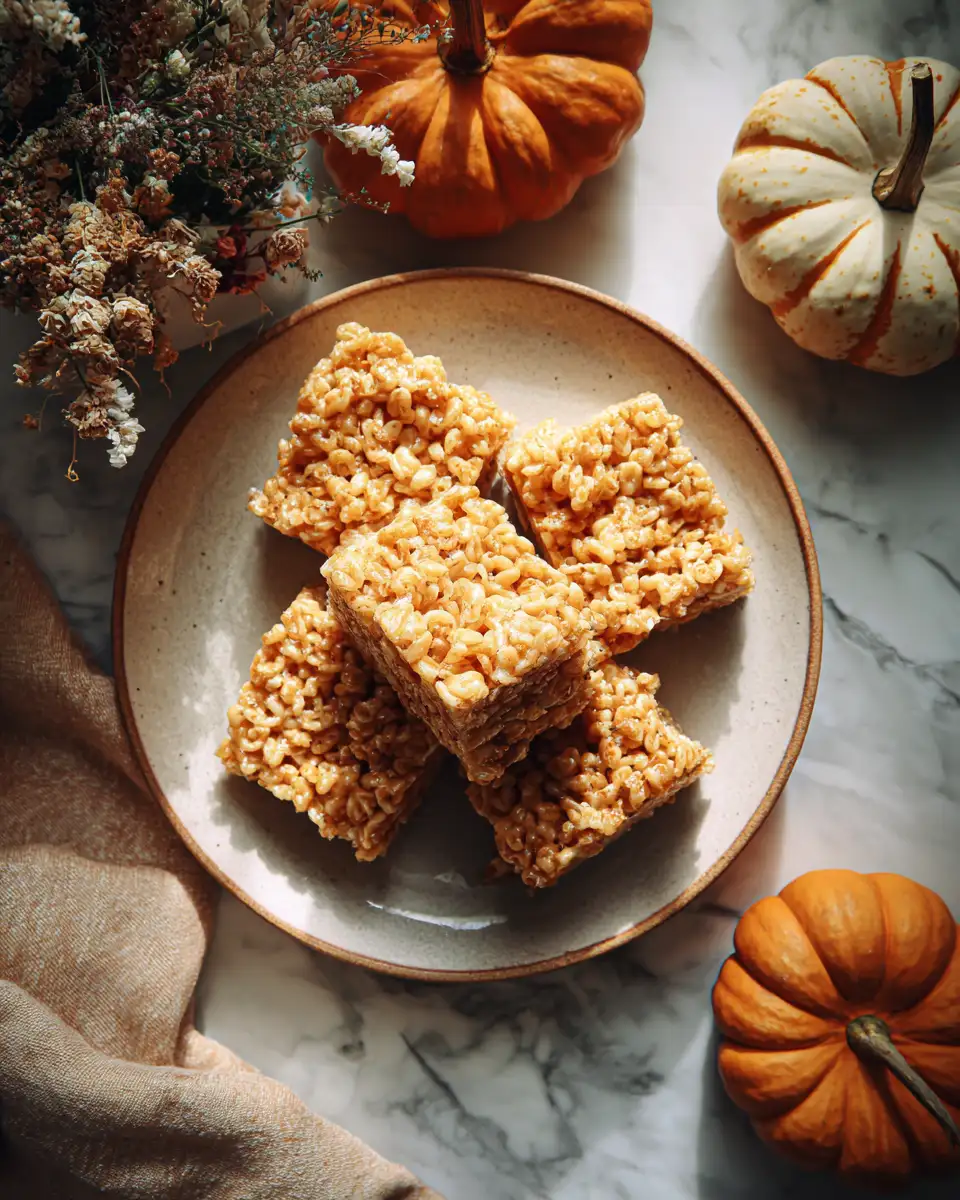
Pumpkin Rice Krispie Treats shine brightest when enjoyed simply, but they also play well with others. Here are a few ideas to elevate your snack time or dessert spread:
- Pair them with a warm cup of spiced apple cider or chai tea to enhance those cozy fall flavors.
- Serve alongside a scoop of vanilla bean ice cream for a delightful contrast of temperatures and textures.
- For a festive touch, drizzle melted dark chocolate or caramel over the top before setting.
- Sprinkle a handful of toasted pumpkin seeds on the treats for an added crunch and a nod to the season.
- Wrap individual bars in parchment and tie with a rustic ribbon for charming homemade gifts that carry a bit of mountain home warmth.
In my family, these treats often made their way into picnic baskets or church potlucks, where they were met with smiles and second helpings. They’re a humble dessert with a heart full of nostalgia.
Storage and Reheating Tips
Keeping your Pumpkin Rice Krispie Treats fresh is simple, but a little care goes a long way. Here’s what I’ve found works best:
- Store them in an airtight container at room temperature for up to 3 days.
- If you want to keep them longer, wrap each treat tightly in plastic wrap and freeze for up to 1 month.
- To thaw, let frozen treats sit at room temperature for about an hour — they’ll soften back to chewy perfection.
- Avoid refrigerating if you can; it tends to dry out the treats, making them less tender.
- If you like your treats warm, pop them in the microwave for 10-15 seconds, just until soft but not melted.
Storing food the way Mama Lu did — wrapped with care, kept close, and shared generously — always felt like an extension of the love she folded into every dish. These little treats carry that tradition forward, one bite at a time.
Frequently Asked Questions
What are the main ingredients for Pumpkin Rice Krispie Treats?
The main ingredients for Pumpkin Rice Krispie Treats include the items listed in our ingredients section above. Each ingredient plays a crucial role in achieving the perfect flavor and texture.
How long does it take to make Pumpkin Rice Krispie Treats?
The total time to make Pumpkin Rice Krispie Treats includes both preparation and cooking time. Check the recipe card above for exact timing details.
Can I make Pumpkin Rice Krispie Treats ahead of time?
Yes, Pumpkin Rice Krispie Treats can often be prepared in advance. Store it properly in an airtight container in the refrigerator and consume within the recommended timeframe.
What can I serve with Pumpkin Rice Krispie Treats?
Pumpkin Rice Krispie Treats pairs well with various sides and accompaniments. Consider the serving suggestions mentioned in the recipe for the best dining experience.
Is Pumpkin Rice Krispie Treats suitable for special diets?
Depending on the ingredients used, Pumpkin Rice Krispie Treats may be adapted for various dietary needs. Check the ingredients list and consider substitutions as needed for your dietary requirements.
Final Thoughts
Making Pumpkin Rice Krispie Treats is more than just mixing ingredients; it’s stepping into a kitchen filled with memories, smells, and stories that linger long after the last crumb is gone. It’s about honoring the quiet wisdom of Mama Lu’s hands and the rhythm of a home where food was the language of love.
These treats remind me that sometimes, the simplest recipes hold the richest comfort. They’re perfect for those moments when you want to bring a little warmth and sweetness into your day — whether you’re sharing with family, friends, or simply savoring a quiet moment on your own. So, next time you’re looking for a nostalgic, easy, and utterly delicious treat, I hope you’ll reach for this recipe and find your own porch-swing memories in every bite.

