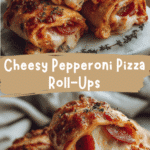
Irresistible Cheesy Pepperoni Pizza Roll-Ups You Need to Try
There’s something about the smell of melted cheese and pepperoni wafting through the kitchen that takes me right back to those lazy summer afternoons on Mama Lu’s porch. Those days were filled with laughter, the hum of cicadas, and the comforting ritual of turning simple food into magic. Cheesy Pepperoni Pizza Roll-Ups are exactly that kind of magic — warm, gooey, and wrapped in a bit of nostalgia, yet perfect for today’s busy weeknights when you want something quick but still rooted in that feeling of home.
Table of Contents
Why You’ll Love This Cheesy Pepperoni Pizza Roll-Ups
Growing up in our Blue Ridge farmhouse, food was never just fuel — it was our way of speaking love without words. Cheesy Pepperoni Pizza Roll-Ups capture that same spirit of comfort and togetherness. They’re handheld, easy to share, and bring that familiar pizza flavor in a way that feels fresh and fun. Plus, they’re adaptable. Whether you’re feeding a crowd or just sneaking a snack, these roll-ups are a crowd-pleaser that don’t require fancy ingredients or hours in the kitchen.
When I first started making these roll-ups, I thought about Mama Lu’s skillet cornbread — how she never measured, just trusted her instincts and the rhythm of cooking. That’s the approach I encourage here: use what you have, trust your taste buds, and don’t be afraid to get a little messy. These roll-ups are forgiving, satisfying, and perfect for anyone who loves a good, cheesy bite with a little pepperoni kick.
Ingredients You’ll Need for This Cheesy Pepperoni Pizza Roll-Ups

- 1 package (about 8 ounces) refrigerated pizza dough or homemade dough if you’re feeling adventurous
- 1 cup shredded mozzarella cheese (freshly shredded melts best, but pre-shredded works too)
- 1/2 cup sliced pepperoni (adjust to taste — more for the pepperoni lovers!)
- 1/2 cup pizza sauce or marinara, plus extra for dipping
- 1 tablespoon olive oil or melted butter for brushing
- 1 teaspoon dried Italian seasoning (optional, but adds a nice herby touch)
- 1/4 teaspoon garlic powder (optional)
- Flour for dusting your work surface
Substitutions: If you don’t have pepperoni, thinly sliced salami or cooked sausage make great alternatives. For cheese, a blend of mozzarella and provolone adds a little depth. And if pizza dough isn’t on hand, a sturdy biscuit dough can work in a pinch, though the texture will be a bit different.
Nutrition Facts
- Calories: Approximately 280 per roll-up (depends on size and ingredients)
- Protein: 12g
- Fat: 14g (mostly from cheese and pepperoni)
- Carbohydrates: 24g
- Fiber: 1g
- Sugar: 3g (mostly from the sauce)
- Sodium: 600mg (pepperoni and cheese contribute most)
These numbers are estimates, but they give you a sense of how these roll-ups fit into a balanced meal or snack. When I was a kid, we didn’t count calories — we counted on food to bring us together and keep us going. So enjoy, but maybe balance it out with a crisp salad or some fresh veggies on the side.
PrintIrresistible Cheesy Pepperoni Pizza Roll-Ups You Need to Try

Learn how to make delicious Cheesy Pepperoni Pizza Roll-Ups. Easy recipe with step-by-step instructions.
- Prep Time: 15 minutes
- Cook Time: 30 minutes
- Total Time: 45 minutes
- Yield: 4 servings 1x
- Category: Main Dish
- Method: Cooking
- Cuisine: International
Ingredients
- 1 package (about 8 ounces) refrigerated pizza dough or homemade dough if you’re feeling adventurous
- 1 cup shredded mozzarella cheese (freshly shredded melts best, but pre-shredded works too)
- 1/2 cup sliced pepperoni (adjust to taste — more for the pepperoni lovers!)
- 1/2 cup pizza sauce or marinara, plus extra for dipping
- 1 tablespoon olive oil or melted butter for brushing
- 1 teaspoon dried Italian seasoning (optional, but adds a nice herby touch)
- 1/4 teaspoon garlic powder (optional)
- Flour for dusting your work surface
Substitutions: If you don’t have pepperoni, thinly sliced salami or cooked sausage make great alternatives. For cheese, a blend of mozzarella and provolone adds a little depth. And if pizza dough isn’t on hand, a sturdy biscuit dough can work in a pinch, though the texture will be a bit different.
Instructions
- Preheat your oven to 375°F and line a baking sheet with parchment paper. This keeps things simple and prevents sticking — just like Mama Lu’s trusty cast iron skillet did for her cornbread.
- Lightly flour your work surface and roll out the pizza dough into a rough rectangle, about 12 by 8 inches. Don’t worry about perfection — rustic is part of the charm.
- Spread the pizza sauce evenly over the dough, leaving about a half-inch border around the edges. Think of it like spreading blackberry jam on Mama Lu’s biscuits — generous but not drowning the dough.
- Sprinkle the shredded mozzarella evenly over the sauce, then layer on your pepperoni slices. If you like, sprinkle the dried Italian seasoning and garlic powder over the top for a little extra flavor.
- Starting from one of the longer sides, carefully roll the dough into a tight log, pinching the seam to seal. This step reminds me of rolling out biscuit dough with Mama Lu, pressing gently but firmly so it holds together.
- Using a sharp knife, slice the log into 1- to 1.5-inch thick pieces. Place each piece cut-side up on your prepared baking sheet, spacing them about an inch apart.
- Brush the tops with olive oil or melted butter. This golden touch adds a lovely sheen and helps those edges crisp up nicely — just like Mama Lu’s final touch on her Sunday pot roast.
- Bake in the preheated oven for 15-18 minutes, or until the roll-ups are golden brown and the cheese is bubbly. Keep an eye on them — every oven is a little different, and you want that perfect balance of crispy crust and melty center.
- Remove from the oven and let cool for a few minutes before serving. Trust me, those first bites are worth the wait.
Steps to Create Your Cheesy Pepperoni Pizza Roll-Ups
- Preheat your oven to 375°F and line a baking sheet with parchment paper. This keeps things simple and prevents sticking — just like Mama Lu’s trusty cast iron skillet did for her cornbread.
- Lightly flour your work surface and roll out the pizza dough into a rough rectangle, about 12 by 8 inches. Don’t worry about perfection — rustic is part of the charm.
- Spread the pizza sauce evenly over the dough, leaving about a half-inch border around the edges. Think of it like spreading blackberry jam on Mama Lu’s biscuits — generous but not drowning the dough.
- Sprinkle the shredded mozzarella evenly over the sauce, then layer on your pepperoni slices. If you like, sprinkle the dried Italian seasoning and garlic powder over the top for a little extra flavor.
- Starting from one of the longer sides, carefully roll the dough into a tight log, pinching the seam to seal. This step reminds me of rolling out biscuit dough with Mama Lu, pressing gently but firmly so it holds together.
- Using a sharp knife, slice the log into 1- to 1.5-inch thick pieces. Place each piece cut-side up on your prepared baking sheet, spacing them about an inch apart.
- Brush the tops with olive oil or melted butter. This golden touch adds a lovely sheen and helps those edges crisp up nicely — just like Mama Lu’s final touch on her Sunday pot roast.
- Bake in the preheated oven for 15-18 minutes, or until the roll-ups are golden brown and the cheese is bubbly. Keep an eye on them — every oven is a little different, and you want that perfect balance of crispy crust and melty center.
- Remove from the oven and let cool for a few minutes before serving. Trust me, those first bites are worth the wait.
Tips for Making the Best Cheesy Pepperoni Pizza Roll-Ups
One of my favorite lessons from Mama Lu’s kitchen was that cooking is as much about feel as it is about following rules. Here are a few tips that will help you make these roll-ups just right: Learn more: Healthy Ground Beef Recipes for Dinner That Everyone Will Love
- Don’t rush the rolling: Take your time rolling the dough to avoid tearing. A gentle, steady hand keeps the ingredients inside and the roll nice and tight.
- Use fresh mozzarella when possible: It melts better and gives you that gooey, stringy goodness we all crave. If you only have shredded pre-packaged cheese, toss it in a bowl and fluff it up with your hands to help it melt evenly.
- Adjust pepperoni quantity: I love a pepperoni-heavy bite, but if you’re making these for kids or picky eaters, feel free to dial it back or swap in veggies like diced bell peppers or mushrooms.
- Brush with butter for a richer crust: Olive oil is great for a lighter touch, but melted butter adds a cozy, nostalgic flavor that reminds me of those biscuit mornings with Mama Lu.
- Serve warm: Pizza roll-ups are best enjoyed fresh from the oven. If you have leftovers, reheat gently to keep that cheese melty and delicious.
Serving Suggestions and Pairings

In our farmhouse, meals were always about sharing and pairing. When I bring out a pan of Cheesy Pepperoni Pizza Roll-Ups, I like to set the table with simple sides that complement without overshadowing:
- A crisp green salad with a tangy vinaigrette to cut through the richness
- Pickled vegetables or a small bowl of olives for a briny contrast
- A bowl of extra pizza sauce or ranch dressing for dipping
- For a heartier meal, a cup of homemade tomato soup or a steaming bowl of vegetable chili pairs beautifully
These little roll-ups are perfect for game nights, casual dinners, or feeding a hungry group of kids after school. I remember how Mama Lu’s food always brought us together, no matter the occasion, and these roll-ups carry on that tradition.
Storage and Reheating Tips
Like any good home-cooked meal, sometimes you have leftovers — and that’s a good problem to have with Cheesy Pepperoni Pizza Roll-Ups. Here’s how to keep them tasting fresh:
- Storage: Let the roll-ups cool completely, then store them in an airtight container in the refrigerator for up to 3 days.
- Freezing: For longer storage, place the cooled roll-ups on a baking sheet and freeze until solid. Then transfer to a freezer-safe bag or container. Freeze for up to 2 months.
- Reheating: To reheat, place roll-ups on a baking sheet and warm in a 350°F oven for 8-10 minutes, or until heated through and cheese is melty. Avoid microwaving if you can — the crust loses its crispness.
When I was growing up, Mama Lu always said that leftovers only get better with a little care and attention. I find the same is true here. A quick reheat brings back that fresh-baked warmth and gooey cheese that feels like a hug on a plate.
Frequently Asked Questions
What are the main ingredients for Cheesy Pepperoni Pizza Roll-Ups?
The main ingredients for Cheesy Pepperoni Pizza Roll-Ups include the items listed in our ingredients section above. Each ingredient plays a crucial role in achieving the perfect flavor and texture.
How long does it take to make Cheesy Pepperoni Pizza Roll-Ups?
The total time to make Cheesy Pepperoni Pizza Roll-Ups includes both preparation and cooking time. Check the recipe card above for exact timing details.
Can I make Cheesy Pepperoni Pizza Roll-Ups ahead of time?
Yes, Cheesy Pepperoni Pizza Roll-Ups can often be prepared in advance. Store it properly in an airtight container in the refrigerator and consume within the recommended timeframe.
What can I serve with Cheesy Pepperoni Pizza Roll-Ups?
Cheesy Pepperoni Pizza Roll-Ups pairs well with various sides and accompaniments. Consider the serving suggestions mentioned in the recipe for the best dining experience.
Is Cheesy Pepperoni Pizza Roll-Ups suitable for special diets?
Depending on the ingredients used, Cheesy Pepperoni Pizza Roll-Ups may be adapted for various dietary needs. Check the ingredients list and consider substitutions as needed for your dietary requirements.
Final Thoughts
Cheesy Pepperoni Pizza Roll-Ups are more than just a quick meal; they’re a little slice of the farmhouse kitchen I carry with me. They remind me of Mama Lu’s slow afternoons, the stories shared over food, and the way simple ingredients — flour, cheese, pepperoni — can come together to create something full of love and comfort.
Whether you’re rolling these up for your family, friends, or just yourself, I hope you find the same joy in making and sharing them that I do. They’re easy enough for a weeknight, but special enough to feel like a little celebration — a reminder that good food, like good stories, is best when shared.
“Recipes weren’t written,” Mama Lu would say with a smile. “They were remembered. Shared by heart, with a pinch of salt and a whole lot of soul.”