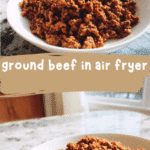
Crispy and Juicy Ground Beef in Air Fryer Made Easy
Learn how to make delicious ground beef in air fryer. Easy recipe with step-by-step instructions.
- Prep Time: 15 minutes
- Cook Time: 30 minutes
- Total Time: 45 minutes
- Yield: 4 servings 1x
- Category: Main Dish
- Method: Cooking
- Cuisine: International
Ingredients
- 1 pound ground beef (80/20 for best flavor and moisture)
- 1/2 teaspoon kosher salt (or to taste)
- 1/4 teaspoon freshly ground black pepper
- 1/2 teaspoon smoked paprika (optional, adds a subtle smoky depth)
- 1/4 teaspoon garlic powder
- 1 tablespoon finely chopped onion (optional, for a touch of sweetness)
- Cooking spray or a light brush of olive oil to prevent sticking
If you’re looking to lighten it up, you can swap out half the ground beef for ground turkey or chicken. And if you don’t have smoked paprika, a pinch of regular paprika or even a dash of chili powder works well to give the beef a little personality. Mama Lu always said, “Use what you’ve got, and let the flavors tell their own story.”
Instructions
- Preheat your air fryer to 375°F. I like to let it warm up while I season the beef, just like Mom’s cast iron skillet warming on the stove.
- In a bowl, combine the ground beef with salt, pepper, smoked paprika, garlic powder, and the chopped onion if using. Mix gently with your hands—don’t overwork it or the beef will get tough.
- Shape the beef into loose patties or small meatballs, about 1 to 1½ inches thick. This helps them cook evenly and lets the air circulate around each piece.
- Lightly spray or brush the air fryer basket with cooking spray or olive oil to prevent sticking. This step is key—Mama Lu always said, “A little oil goes a long way in keeping things from sticking.”
- Place the patties or meatballs in a single layer, making sure they don’t touch. You might need to cook in batches depending on the size of your air fryer.
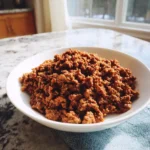
- Cook for 8 to 10 minutes, flipping halfway through. The beef should be browned on the outside, with an internal temperature of 160°F for safety. I find that checking with a meat thermometer helps keep that tender juiciness just right, much like when Mama Lu would peek inside the pot roast to know when it was done.
- Remove the beef carefully and let it rest for a few minutes. This lets the juices redistribute, making every bite as satisfying as the last.
From my kitchen to yours, this method feels like a little gift—a shortcut that doesn’t skip on heart. It’s the kind of thing I’d have loved to share with Mama Lu, who believed every meal should be a celebration of togetherness, even when time was tight.
Find it online: https://claracooking.com/ground-beef-in-air-fryer/