Spooky and Sweet Halloween Cookies to Delight Your Taste Buds
There’s something about the crisp fall air that brings me back to the old farmhouse nestled deep in the Blue Ridge Mountains where I grew up. It was Mama Lu’s kitchen that really shaped how I see food—not just as fuel, but as a way to gather, to celebrate, and to make memories. Halloween cookies, with their playful shapes and warm spices, have always held a special place in my heart. They’re more than just treats; they’re little bundles of nostalgia, perfect for sharing stories around the table or passing along to neighbors wrapped in wax paper. Today, I want to take you on a journey with a recipe that’s simple, soulful, and just a little bit magical—just like those autumn afternoons spent with flour on our noses and laughter filling the air.
Table of Contents
Why You’ll Love This halloween cookies
Growing up, Halloween was never just about costumes and candy. It was about the quiet moments before the night’s excitement—the smell of cinnamon and nutmeg drifting from the oven, the rustling of parchment paper, and the gentle clink of cookie cutters. These halloween cookies capture that spirit perfectly. They’re soft but sturdy enough to hold intricate shapes, lightly spiced to warm your kitchen, and just sweet enough to satisfy without overwhelming.
What makes these cookies truly special is their connection to tradition. I remember Mama Lu’s soft-spoken wisdom as she’d say, “Food is remembered, not measured.” This recipe respects that philosophy, blending familiar flavors with a touch of whimsy. Whether you’re baking with kids, looking for a festive treat to share with friends, or just craving a taste of home, these cookies bring a warmth that’s hard to find in store-bought sweets.
Plus, they’re perfect for decorating. Whether you prefer a simple dusting of powdered sugar or a splash of homemade icing, these cookies invite creativity and togetherness—two things Mama Lu valued above all.
Ingredients You’ll Need for This halloween cookies
- 2 ¾ cups all-purpose flour
- 1 teaspoon baking powder
- ½ teaspoon baking soda
- 1 teaspoon ground cinnamon
- ½ teaspoon ground nutmeg
- ½ teaspoon salt
- ¾ cup unsalted butter, softened
- 1 cup granulated sugar
- 1 large egg
- 1 teaspoon vanilla extract
- 2 tablespoons whole milk
- Optional for decorating: powdered sugar, royal icing, or colored sugar sprinkles
If you’re looking to make these cookies a bit heartier, I sometimes swap out half the all-purpose flour for whole wheat pastry flour—Mama Lu always believed in making do with what you had. Or, for a dairy-free version, coconut oil works beautifully in place of butter, though it gives a slightly different texture and flavor.
Nutrition Facts
- Calories: Approximately 150 per cookie (based on 24 cookies)
- Protein: 2g
- Fat: 7g
- Carbohydrates: 20g
- Fiber: 1g
- Sugar: 10g
- Sodium: 110mg
These numbers are based on traditional ingredients and typical serving sizes. Keep in mind, decorating choices like icing or sprinkles will add sugar and calories. But as Mama Lu used to remind me, “A little sweetness goes a long way when shared with folks you love.” Learn more: Irresistible Butterfinger Caramel Crunch Cookies You Have to Try
PrintSpooky and Sweet Halloween Cookies to Delight Your Taste Buds

Learn how to make delicious halloween cookies. Easy recipe with step-by-step instructions.
- Prep Time: 15 minutes
- Cook Time: 30 minutes
- Total Time: 45 minutes
- Yield: 4 servings 1x
- Category: Main Dish
- Method: Cooking
- Cuisine: International
Ingredients
- 2 ¾ cups all-purpose flour
- 1 teaspoon baking powder
- ½ teaspoon baking soda
- 1 teaspoon ground cinnamon
- ½ teaspoon ground nutmeg
- ½ teaspoon salt
- ¾ cup unsalted butter, softened
- 1 cup granulated sugar
- 1 large egg
- 1 teaspoon vanilla extract
- 2 tablespoons whole milk
- Optional for decorating: powdered sugar, royal icing, or colored sugar sprinkles
If you’re looking to make these cookies a bit heartier, I sometimes swap out half the all-purpose flour for whole wheat pastry flour—Mama Lu always believed in making do with what you had. Or, for a dairy-free version, coconut oil works beautifully in place of butter, though it gives a slightly different texture and flavor.
Instructions
- Preheat your oven to 350°F (175°C) and line two baking sheets with parchment paper. This helps the cookies bake evenly and prevents sticking—something Mama Lu taught me early on when we’d bake on the old, worn kitchen table.
- In a medium bowl, whisk together the flour, baking powder, baking soda, cinnamon, nutmeg, and salt. This blend of spices is what sets these halloween cookies apart, giving them that warm, autumnal hug.
- In a large bowl, beat the softened butter and granulated sugar together until light and fluffy. It usually takes about 3-4 minutes with an electric mixer or a good arm workout by hand. This step is key to getting that tender crumb Mama Lu’s skillet cornbread was famous for.
- Beat in the egg and vanilla extract until fully incorporated. The egg binds everything together, while the vanilla adds a subtle depth that makes these cookies feel like home.
- Gradually add the dry ingredients to the wet, mixing just until combined. Overmixing can make cookies tough, and that’s a mistake I’ve learned to avoid after many a batch.
- Stir in the milk to bring the dough together—it should be soft but not sticky. If it feels too wet, add a little more flour, a tablespoon at a time.
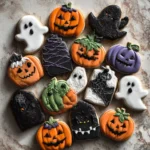
- Turn the dough out onto a lightly floured surface and roll it to about ¼-inch thickness. Now comes the fun part—cutting out shapes! I still remember bending over the kitchen counter with Mama Lu, our hands dusted in flour, pressing out leaves, pumpkins, and ghosts.
- Place the cutouts on your prepared baking sheets about 2 inches apart. This gives them room to spread without losing their shape.
- Bake for 10-12 minutes, or until the edges just start to turn golden. Keep a close eye—the smell will be irresistible, and the cookies can go from perfect to overdone in a flash.
- Remove from the oven and let the cookies cool on the baking sheets for 5 minutes before transferring to a wire rack to cool completely. This resting time helps them firm up just right, ready for decorating or enjoying as-is.
Steps to Create Your halloween cookies
- Preheat your oven to 350°F (175°C) and line two baking sheets with parchment paper. This helps the cookies bake evenly and prevents sticking—something Mama Lu taught me early on when we’d bake on the old, worn kitchen table.
- In a medium bowl, whisk together the flour, baking powder, baking soda, cinnamon, nutmeg, and salt. This blend of spices is what sets these halloween cookies apart, giving them that warm, autumnal hug.
- In a large bowl, beat the softened butter and granulated sugar together until light and fluffy. It usually takes about 3-4 minutes with an electric mixer or a good arm workout by hand. This step is key to getting that tender crumb Mama Lu’s skillet cornbread was famous for.
- Beat in the egg and vanilla extract until fully incorporated. The egg binds everything together, while the vanilla adds a subtle depth that makes these cookies feel like home.
- Gradually add the dry ingredients to the wet, mixing just until combined. Overmixing can make cookies tough, and that’s a mistake I’ve learned to avoid after many a batch.
- Stir in the milk to bring the dough together—it should be soft but not sticky. If it feels too wet, add a little more flour, a tablespoon at a time.
- Turn the dough out onto a lightly floured surface and roll it to about ¼-inch thickness. Now comes the fun part—cutting out shapes! I still remember bending over the kitchen counter with Mama Lu, our hands dusted in flour, pressing out leaves, pumpkins, and ghosts.
- Place the cutouts on your prepared baking sheets about 2 inches apart. This gives them room to spread without losing their shape.
- Bake for 10-12 minutes, or until the edges just start to turn golden. Keep a close eye—the smell will be irresistible, and the cookies can go from perfect to overdone in a flash.
- Remove from the oven and let the cookies cool on the baking sheets for 5 minutes before transferring to a wire rack to cool completely. This resting time helps them firm up just right, ready for decorating or enjoying as-is.
Tips for Making the Best halloween cookies
Over the years, I’ve learned that baking is as much about feel as it is about precision. Mama Lu never reached for a measuring cup without a story or a memory attached, and that’s a lesson I carry with me in every kitchen.
- Use room temperature butter and egg: This helps everything blend smoothly and creates a tender crumb.
- Don’t overwork the dough: Mix just until the flour disappears. Over-kneading makes the cookies tough, and nobody wants that.
- Chill the dough: If you have time, wrap the dough and chill it for at least 30 minutes. It makes rolling and cutting so much easier, especially if it’s warm where you live.
- Get creative with shapes: Halloween is about fun. Use cookie cutters shaped like bats, witches, or even simple stars. I still keep a collection of vintage cutters from Mama Lu’s kitchen, each with its own memory.
- Decorate with love: Whether it’s a dusting of powdered sugar or hand-piped icing, decorating these cookies can be a family affair. I’ve found that laughing over messy hands and imperfect designs makes the cookies taste even better.
Serving Suggestions and Pairings

When I bring these halloween cookies to a gathering, I like to serve them alongside something warm and comforting—like a steaming cup of spiced apple cider or a rich hot chocolate topped with whipped cream. Mama Lu always believed that a little something warm made sweets feel like a genuine invitation to slow down and savor the moment.
These cookies also pair beautifully with a sharp cheddar cheese for those who prefer a sweet-and-savory combo. It’s a bit like the way she’d serve cornbread with pot roast—unexpected but perfect.
If you’re hosting a Halloween party, consider setting up a little decorating station with bowls of icing, sprinkles, and edible glitter. Watching kids and adults alike get playful with their creations is one of the best parts of the season.
Storage and Reheating Tips
These cookies keep well, which is great for those busy fall days when you want to bake ahead. Once completely cooled, store them in an airtight container at room temperature for up to a week. If you decorate with icing, place parchment paper between layers to keep things neat.
For longer storage, these cookies freeze beautifully. Pop them into a freezer-safe bag or container, and they’ll last up to 3 months. When you’re ready to enjoy, let them thaw at room temperature. If you want to freshen them up, a quick 5-7 minute warm-up in a 300°F oven can bring back that just-baked magic.
Frequently Asked Questions
What are the main ingredients for halloween cookies?
The main ingredients for halloween cookies include the items listed in our ingredients section above. Each ingredient plays a crucial role in achieving the perfect flavor and texture.
How long does it take to make halloween cookies?
The total time to make halloween cookies includes both preparation and cooking time. Check the recipe card above for exact timing details.
Can I make halloween cookies ahead of time?
Yes, halloween cookies can often be prepared in advance. Store it properly in an airtight container in the refrigerator and consume within the recommended timeframe.
What can I serve with halloween cookies?
halloween cookies pairs well with various sides and accompaniments. Consider the serving suggestions mentioned in the recipe for the best dining experience.
Is halloween cookies suitable for special diets?
Depending on the ingredients used, halloween cookies may be adapted for various dietary needs. Check the ingredients list and consider substitutions as needed for your dietary requirements.
Final Thoughts
Every time I make these halloween cookies, I’m transported back to that farmhouse kitchen where Mama Lu’s hands taught me more about love and patience than any recipe ever could. These cookies are a little piece of that legacy—simple, comforting, and made to be shared.
“Recipes weren’t written,” Mama Lu used to say, “They were remembered. Shared by heart, with a pinch of salt and a whole lot of soul.”
So, whether you’re baking with children hovering expectantly or sneaking a cookie with your morning coffee, know that you’re part of a tradition that goes far beyond flour and sugar. These halloween cookies are about connection, warmth, and the stories that make a house a home. And that, to me, is the sweetest treat of all.