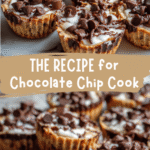
The Ultimate Recipe for Chocolate Chip Cookie Dough Cups You Have to Try
There’s something about THE RECIPE for Chocolate Chip Cookie Dough Cups that takes me right back to those slow afternoons on the porch of our old farmhouse in the Blue Ridge Mountains. Mama Lu never made these exact treats, but her spirit lived in every bite — the way simple things like butter and sugar could come alive with a little patience and love. These cookie dough cups are more than just a dessert; they’re a little pocket of nostalgia wrapped in chocolate, perfect for sharing or savoring in quiet moments. Let me take you through this recipe that feels like a warm hug from home, one spoonful at a time.
Table of Contents
Why You’ll Love This THE RECIPE for Chocolate Chip Cookie Dough Cups
There’s a reason these cookie dough cups are a favorite in my kitchen. They hit that sweet spot between rich and comforting, with a texture that’s soft, chewy, and just a little bit gooey — much like the memories I carry of Mama Lu’s skillet cornbread fresh from the oven. What makes this recipe special isn’t just the taste, but the way it brings people together. Whether it’s a crowd at a potluck or a quiet night in with a cup of tea, these cups feel like an invitation to slow down and savor something simple yet deeply satisfying.
Plus, this recipe is incredibly forgiving. I remember one afternoon, when I was trying to replicate a childhood favorite far from home, I accidentally swapped brown sugar for white sugar—and it still turned out delicious. That’s the kind of recipe that lets you make it your own, just like Mama Lu would have wanted. So, if you’re looking for a treat that’s easy to make, easy to share, and full of heart, this is the one to try.
Ingredients You’ll Need for This THE RECIPE for Chocolate Chip Cookie Dough Cups

- 1 cup unsalted butter, softened (you can substitute with vegan butter for dairy-free)
- 3/4 cup packed light brown sugar
- 1/4 cup granulated sugar
- 2 teaspoons pure vanilla extract
- 1/2 teaspoon salt
- 2 cups all-purpose flour (feel free to use a gluten-free blend if needed)
- 1 cup mini semisweet chocolate chips
- 1/4 cup cream or milk (or almond milk for a dairy-free option)
- 8 ounces bittersweet or semisweet chocolate, chopped (for melting and coating)
Growing up, we didn’t measure much, but I found that these precise amounts help balance the flavors just right — a little tip Mama Lu would have smiled at, knowing how easy it is to get lost in the rhythm of baking.
Nutrition Facts
- Calories: Approximately 280 per cookie dough cup
- Protein: 3g
- Fat: 17g (mostly from butter and chocolate)
- Carbohydrates: 28g
- Fiber: 1.5g
- Sugar: 18g
- Sodium: 120mg
These numbers reflect a typical serving size, but like the stories Mama Lu shared, there’s room here for flexibility and forgiveness. After all, food is about joy and connection as much as it is about nutrition. Learn more: Irresistible Salted Caramel Chocolate Chip Cookie Bars You Need to Try
PrintThe Ultimate Recipe for Chocolate Chip Cookie Dough Cups You Have to Try

Learn how to make delicious THE RECIPE for Chocolate Chip Cookie Dough Cups. Easy recipe with step-by-step instructions.
- Prep Time: 15 minutes
- Cook Time: 30 minutes
- Total Time: 45 minutes
- Yield: 4 servings 1x
- Category: Main Dish
- Method: Cooking
- Cuisine: International
Ingredients
- 1 cup unsalted butter, softened (you can substitute with vegan butter for dairy-free)
- 3/4 cup packed light brown sugar
- 1/4 cup granulated sugar
- 2 teaspoons pure vanilla extract
- 1/2 teaspoon salt
- 2 cups all-purpose flour (feel free to use a gluten-free blend if needed)
- 1 cup mini semisweet chocolate chips
- 1/4 cup cream or milk (or almond milk for a dairy-free option)
- 8 ounces bittersweet or semisweet chocolate, chopped (for melting and coating)
Growing up, we didn’t measure much, but I found that these precise amounts help balance the flavors just right — a little tip Mama Lu would have smiled at, knowing how easy it is to get lost in the rhythm of baking.
Instructions
- Preheat your oven to 350°F. Line a 12-cup muffin tin with paper liners or lightly grease each cup with butter. This step reminds me of the care Mama Lu took, greasing her cast-iron skillet to keep every bite just right.
- In a large bowl, cream together the softened butter, brown sugar, and granulated sugar until the mixture is fluffy and light, about 3 to 4 minutes. Use a wooden spoon if you want to feel more connected to the dough, just like we did on those porch afternoons.
- Add the vanilla extract and salt, mixing until combined.
- Slowly add the flour, mixing just until incorporated. Don’t overmix — you want the dough tender, not tough. I remember Mama Lu saying, “Let the dough feel like a good friend, not a stranger.”
- Fold in the mini chocolate chips with a spatula, saving a few to sprinkle on top later for a pretty finish.
- Spoon the cookie dough evenly into the prepared muffin cups, pressing it gently to form a cup shape with a small well in the center. This little hollow will cradle the melted chocolate, just like a nest holds a bird’s egg.
- Bake for 12 to 14 minutes, or until edges are golden but centers still look soft — this keeps them tender and chewy.
- While the cookie dough cups cool in the tin for about 10 minutes, melt the chopped chocolate in a heatproof bowl over simmering water or in short bursts in the microwave, stirring frequently to avoid burning.
- Once the cookie cups have cooled slightly, spoon a generous dollop of melted chocolate into each well, then sprinkle the reserved mini chocolate chips on top.
- Place the muffin tin in the refrigerator for at least 30 minutes to let the chocolate set. Patience here pays off — like waiting for blackberry jam to thicken on a summer’s day.
Steps to Create Your THE RECIPE for Chocolate Chip Cookie Dough Cups
- Preheat your oven to 350°F. Line a 12-cup muffin tin with paper liners or lightly grease each cup with butter. This step reminds me of the care Mama Lu took, greasing her cast-iron skillet to keep every bite just right.
- In a large bowl, cream together the softened butter, brown sugar, and granulated sugar until the mixture is fluffy and light, about 3 to 4 minutes. Use a wooden spoon if you want to feel more connected to the dough, just like we did on those porch afternoons.
- Add the vanilla extract and salt, mixing until combined.
- Slowly add the flour, mixing just until incorporated. Don’t overmix — you want the dough tender, not tough. I remember Mama Lu saying, “Let the dough feel like a good friend, not a stranger.”
- Fold in the mini chocolate chips with a spatula, saving a few to sprinkle on top later for a pretty finish.
- Spoon the cookie dough evenly into the prepared muffin cups, pressing it gently to form a cup shape with a small well in the center. This little hollow will cradle the melted chocolate, just like a nest holds a bird’s egg.
- Bake for 12 to 14 minutes, or until edges are golden but centers still look soft — this keeps them tender and chewy.
- While the cookie dough cups cool in the tin for about 10 minutes, melt the chopped chocolate in a heatproof bowl over simmering water or in short bursts in the microwave, stirring frequently to avoid burning.
- Once the cookie cups have cooled slightly, spoon a generous dollop of melted chocolate into each well, then sprinkle the reserved mini chocolate chips on top.
- Place the muffin tin in the refrigerator for at least 30 minutes to let the chocolate set. Patience here pays off — like waiting for blackberry jam to thicken on a summer’s day.
Tips for Making the Best THE RECIPE for Chocolate Chip Cookie Dough Cups
One thing Mama Lu taught me was that every kitchen has its quirks, and every recipe has its secrets. Here are a few I’ve gathered along the way to help your cookie dough cups come out just right:
- Use room temperature butter — it creams better with the sugars and creates that tender crumb we all love.
- If your dough feels too sticky, chill it briefly before scooping; it makes shaping the cups easier without drying out the dough.
- Don’t skip chilling the finished cups after adding the melted chocolate. It’s the best way to get that satisfying snap when you bite in.
- Feel free to swap mini chips for chunks if you prefer bigger pockets of chocolate. I once tried this with chunks from a local chocolate shop in Portland, and it was divine.
- For a little extra flair, sprinkle a tiny pinch of flaky sea salt on top just before chilling. It wakes up the flavors in the same way Mama Lu’s cornbread was often finished with a touch of salt.
Serving Suggestions and Pairings

These cookie dough cups are perfect on their own, but if you want to elevate the experience, consider a few simple pairings that bring out their warmth and depth:
- A cold glass of whole milk or a creamy oat milk latte — reminiscent of those farmhouse breakfasts with Mama Lu’s biscuits.
- A scoop of homemade vanilla bean ice cream for an indulgent dessert that melts into every bite.
- Fresh berries or a drizzle of homemade blackberry jam for a nod to the preserves Mama Lu kept stacked in the pantry.
- A sprinkle of toasted pecans or walnuts for a bit of crunch and a hint of earthiness.
- Pair with a cup of herbal tea — chamomile or mint — for a soothing end to a busy day.
Storage and Reheating Tips
One thing Mama Lu was always clear about: food should be savored, but never rushed. These cookie dough cups keep well, letting you enjoy a little taste of home whenever you need it.
- Store the cookie dough cups in an airtight container in the refrigerator for up to 5 days.
- If you want to keep them longer, freeze them in a single layer on a baking sheet, then transfer to a freezer-safe bag or container. They’ll last up to 2 months this way.
- To enjoy after freezing, thaw them in the refrigerator overnight, then bring to room temperature before serving.
- Reheating is not usually necessary because they’re best served chilled or at room temp, but if you prefer, warm gently in a microwave for 10-15 seconds, watching carefully so the chocolate doesn’t melt completely.
Frequently Asked Questions
What are the main ingredients for THE RECIPE for Chocolate Chip Cookie Dough Cups?
The main ingredients for THE RECIPE for Chocolate Chip Cookie Dough Cups include the items listed in our ingredients section above. Each ingredient plays a crucial role in achieving the perfect flavor and texture.
How long does it take to make THE RECIPE for Chocolate Chip Cookie Dough Cups?
The total time to make THE RECIPE for Chocolate Chip Cookie Dough Cups includes both preparation and cooking time. Check the recipe card above for exact timing details.
Can I make THE RECIPE for Chocolate Chip Cookie Dough Cups ahead of time?
Yes, THE RECIPE for Chocolate Chip Cookie Dough Cups can often be prepared in advance. Store it properly in an airtight container in the refrigerator and consume within the recommended timeframe.
What can I serve with THE RECIPE for Chocolate Chip Cookie Dough Cups?
THE RECIPE for Chocolate Chip Cookie Dough Cups pairs well with various sides and accompaniments. Consider the serving suggestions mentioned in the recipe for the best dining experience.
Is THE RECIPE for Chocolate Chip Cookie Dough Cups suitable for special diets?
Depending on the ingredients used, THE RECIPE for Chocolate Chip Cookie Dough Cups may be adapted for various dietary needs. Check the ingredients list and consider substitutions as needed for your dietary requirements.
Final Thoughts
THE RECIPE for Chocolate Chip Cookie Dough Cups is a little slice of nostalgia, a sweet reminder that the best food isn’t just about ingredients — it’s about the hands that make it and the stories that come with it. From those mountain mornings with Mama Lu to my kitchen in Portland, this recipe has traveled with me, carrying a piece of home in every bite.
“Recipes weren’t written,” Mama Lu used to say, “They were remembered. Shared by heart, with a pinch of salt and a whole lot of soul.”
So, whether you’re baking these cups for a gathering or a quiet night alone, know that you’re part of a tradition — one that celebrates simplicity, love, and the joy of sharing something truly delicious. I hope this recipe brings you as much comfort and happiness as it has brought me, reminding you that sometimes, a little sweetness is all you need to feel right at home.